Friday, August 31, 2012

A quilt and sweater for Baby Kiera

Seeing as Last But Not Least snapped up the vajayjay quilt, I had to whip up a new one on the double for Baby Kiera!


Like the other, this quilt used the grey, yellow and pink colour scheme, to match Kiera's nursery. I love how the two quilts look so entirely different! I have to say this is one of my favourites. I loved every minute of making it, I completely improvised as I went, adding bits here and there. I started with the wonky log cabins, and as Kiera's mom likes strip quilts, I added a couple other different block styles in strips. My kids especially loved the strip of "ruler" fabric along the top, saying that would be perfect to help Kiera's mom measure her as she grows!


I quilted it with an all over loopy pattern, my first time trying this, and I honestly kinda sucked at it. But overall I still think it looks fine, and I love the crinkly effect. I used some Aurafil variegated yellow/white thread, another first, and liked the product. But I am just as happy with the performance of my Connecting Threads thread, which is much less expensive!


On the back I used a large piece of my new absolute favourite fabric by Heather Ross, the pin people, that my friend Angela was kind enough to pick up and send to me when it went on sale at Hancock's (I think??). I absolutely love the light grey colour with the pink and orange and lime accents, it is the perfect backing for this quilt, and I think I need to plan an entire other quilt around this fabric. Lovity love it!


On the back I included a label that I made using printer friendly fabric, and made it in the wonky log cabin style that I had on the front.


This quilt was a bit big for a baby quilt, about 40 by 50 inches. It will be good for Kiera to snuggle up with for some time, I hope!


Along with the quilt, I knit up a sweet little coat using the Baby Tiered Coat pattern by Lisa Chemery on Ravelry (see details on my Ravelry page here). Such a cute pattern! I made it in a nice neutral grey, using a Wool Ease worsted weight yarn held double for thickness, and added some cute yellow buttons as an accent.


Inside I added a label by Izzy and Ivy Designs that we got in our grab bags at Sewing Summit last fall. They are a great product with some really cute styles! I may just order some more of these.


The two were gifted at a nice casual baby shower the other day at my home, and seem to be well loved.


Welcome to the world, Kiera!

Thursday, August 30, 2012

made fresh today :)

Even though it was a million degrees outside today, I was in the mood to do some baking. After cranking out several dozen cookies and 2 large chocolate zucchini cakes, I decided to make a batch of homemade almond butter using this recipe I found via Pinterest. Let me tell you, it is oh so good.


I substituted some pure vanilla for the vanilla beans, and made a batch with just almonds and sea salt as well. I got four 125 ml/4 oz jars from approximately 6 cups of almonds. I dressed up the jars with a wee bit of fabric and jute string, with a handwritten label, for gifting.


Yum!

Wednesday, August 29, 2012

Glow: candle holder tutorial, two ways

I came across this photo on Pinterest and was smitten! Mason jars and lace happen to be two of my favorite things. And I had been holding on to some gorgeous old antique lace, once belonging to my aunt's mother, so this was just the project for me. I got straight to work whipping up a bunch for birthdays for some of the special ladies in my life :) And of course some for me!


They are gorgeous both as vases for the fresh cut flowers blooming in the garden....


...or as candle holders. I love the glow of the flame through the glass and lace!


Also did a knit version. I used a happy rainbow yarn and a pattern adapted from a legging pattern from and old out of print magazine (knit.1, fall/winter 2005 issue, pg 103). Note- I love the yarn, but I think the pattern may have shown up better using a solid. Hard to see in these photos.


Super cute with lots of holes to let the candlelight through, using ribbon to lace it up one side. I made it for a large mason jar; the knit part took me only 1-2 hours, so pretty quick!


I thought I would write down how I made these in case you would like to try, too!

Now, I feel like I am likely insulting your intelligence by providing a tutorial here for the lace version, they are so simple. Looking around on the web, I saw these done with Modpodge or clear tape, but I opted to pull out my trusty glue gun.


Lace Version:

You will need:

A Mason jar (any size you prefer, larger are nicer for flowers)
Lace
Ribbon, jute, raffia or other trim (pearls, beads, fake flowers, buttons...be creative!)
A glue gun (yours needn't be as messy as mine)
Measuring tape

1. Measure circumference of jar with measuring tape, and cut lace, adding 1/2 inch. Cut a piece of ribbon long enough to tie on.


2. Apply hot glue along length of jar, and tack down one end of lace.


3. Stretch lace around jar back to start point. Fold over edge 1/2 inch and glue in place.


4. Add dots of glue around jar at edges of lace to secure it in place at regular intervals.


5. Add ribbon or embellishment of choice.


6. Insert candle, dim lights, and relax in the glow!


For the knit version, you will need:

Mason jar (large is best, mine was 12.5 inches in circumference and 6 inches tall)
Small amount of worsted weight yarn (or other weight, adjusting as necessary for gauge)
Corresponding straight needles (5mm/ US size 8 for worsted weight)
Lacing ribbon, jute or leather
Measuring tape

Measure circumference and height of mason jar. Pattern is for 12.5" circumference and 6.5" tall. Adjust in multiples of 4 stitches to fit jar and gauge.

Cast on 40 stitches.
Row 1 (WS): slip 1 stitch, p2, *k2, p2; rep from *, end k1
Row 2: sl 1, k1, yo, k1, *p2, k2; rep from * to last 5 st, p2, k1, yo, k2
Row 3: sl 1, p3, *k2, p2; rep from * to last 6 st, k2, p3, k1
Row 4: sl 1, k1, k2tog, *p2, k2; rep from * to last 6 st, p2, k1, k2tog, k1
Row 5: sl 1, *p2, k2; rep from * to last 3 st, p2, k1
Row 6: sl 1, *k1, yo, k1, p2; rep from * to last 3 st, k1, yo, k2
Row 7: sl 1, *p3, k2; rep from * to last 4 st, p3, k1
Row 8: sl 1, *k1, k2tog, p2; rep from * to last 4 st, k1, k2tog, k1
Row 9: sl 1, *p2, k1, yo, k1; rep from * to last 3 st, p2, k1
Row 10: sl 1, *k2, p3; rep from * to last 3 st, k3
Row 11: sl 1, *p2, k1, k2tog; rep from * to last 3 st, p2, k1

Repeat rows 6-11 twice more for 6.5" tall jar (note: each repeat is 1 inch).
Repeat rows 1-5 once.
Bind off in pattern.

Finish by weaving in ends and lacing up on jar using holes!

Monday, August 27, 2012

Funny :-)

Saw this sign on my way home from a girls' dinner tonight and it made me laugh out loud!


Gotta love a good sense of humour. Goodnight, friends!

Sunday, August 26, 2012

a knitted baby shrug

Can't help but continue to spoil my friend's new baby Esther Mae. Such a cutie!


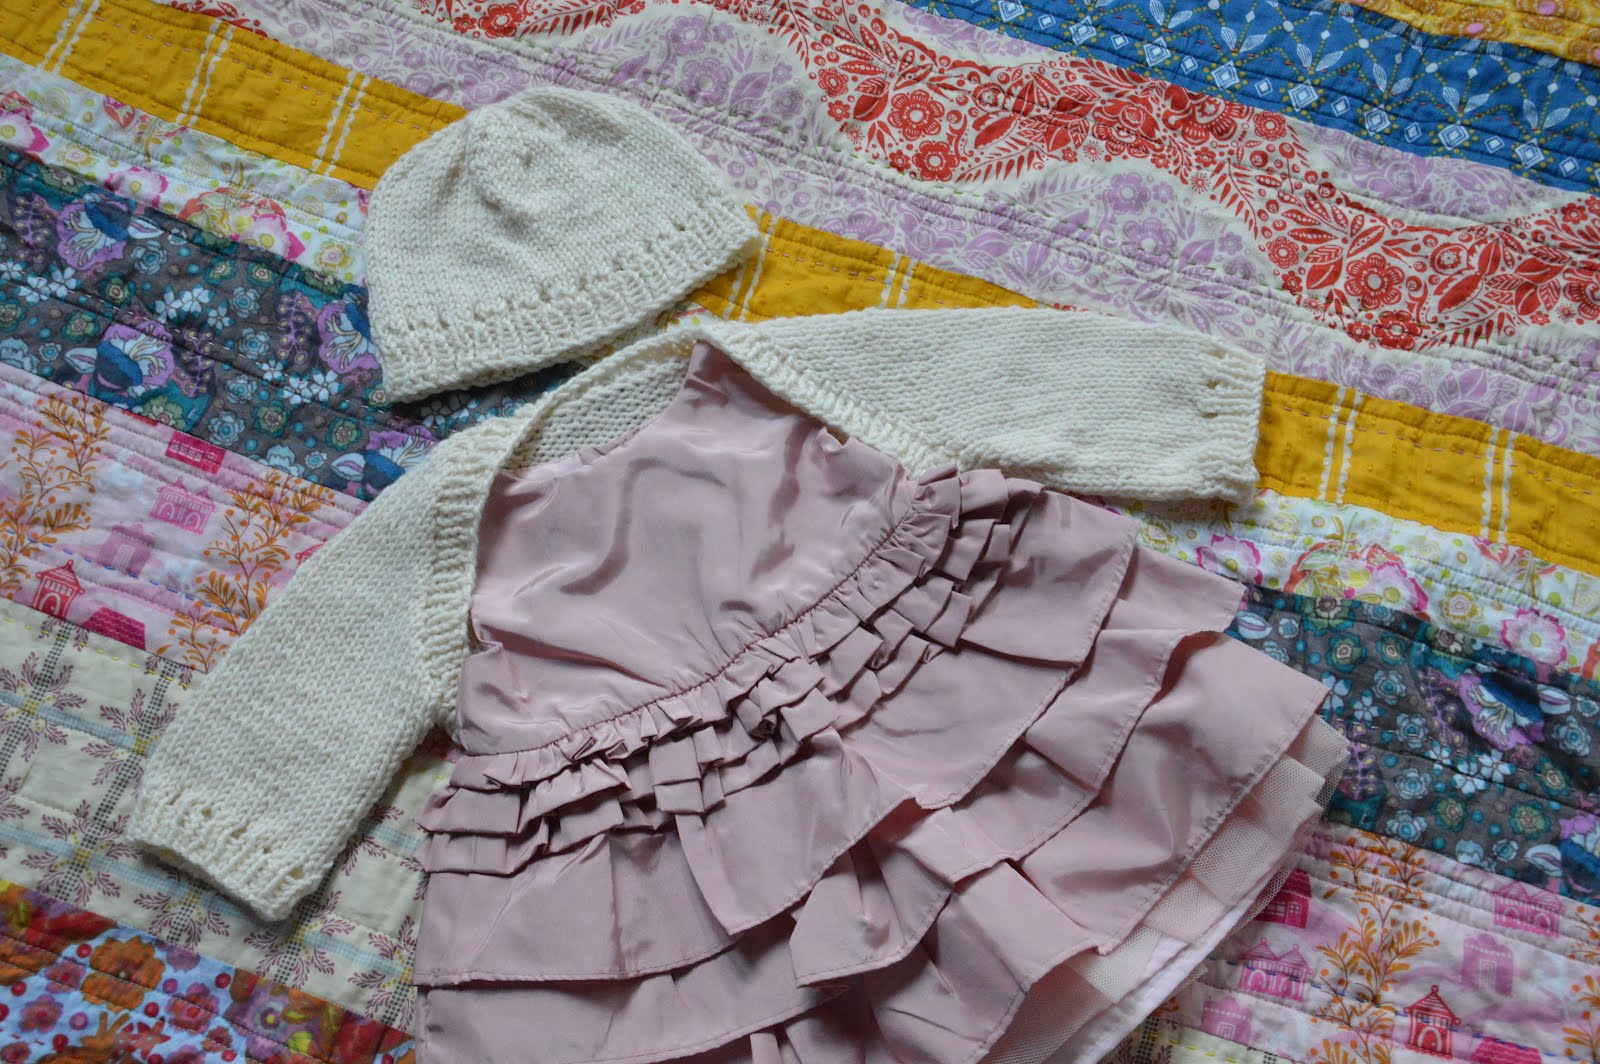
I decided to knit up this adorable wee shrug to be worn throughout the holiday season with sweet little party dresses. And I think it would look equally cute with jeans and a t-shirt! Nice and versatile. Just a little eyelet detail on the sleeves, and that's it, no fuss!


I used the free "Confection"pattern off of Ravelry, and used one skein of lovely green label Tanis Fiber Arts yarn in natural. This yarn is so wonderfully soft, and has the added bonus of being machine washable, important for baby items!


The shrug was finished in only a couple days while at the lake, and I had enough left over to make a matching hat, a pattern I made up myself using the eyelet detail of the shrug. Simple and cute! I will share the pattern with you in a few sizes in an upcoming post.

I will be sending this along to Esther Mae along with a little fancy dress :)

Thursday, August 23, 2012

Stuff that happens when shopping with my kids

You all recall that my kids are crazy, right?


Anyways. School starts up again here on September 5, so I took the gang out for a marathon of back-to-school shopping for supplies, shoes and clothing.

Sounds boring, right? Well, never in MY life.

First stop: I am speaking to a salesperson and Kid 1 asks for a loonie (FYI- that is a Canadian dollar coin) to buy something from a vending machine. No. Then Kid 2 tries, and so on. Then suddenly, I hear this hooting and hollering as if we were winners at the casino. They had found a coin and tried to buy a bag of chips to share. Instead, the machine spewed out 3 bags of chips and 4 Pepsis, and THEN returned their coin. Best. Day. Ever (according to them)!

Next stop: As I am at the checkout paying for umpteen pairs of school shoes, I hears giggle and the comment, "It's so big!". My Mommy senses are alerted. I turn to see my 3 children, all standing next to a mannequin at the exit, having unzipped it's pants and peeping inside to check out its....well...anatomy. Oh my.

Clothing shopping: my girls bursting into song and dance in the store ("You're never fully dressed without a smile!" from Annie). And insisting that we buy these outfits:


I may have caved. Dang, they're cute.

So that is the story of my day. As Big G told the hubs when he came home, "It was EPIC!"

Hope you had a good one!

Tuesday, August 21, 2012

The va-jay-jay quilt

I wanted to make something fabulous for my co-worker's new baby girl. We have worked together for years, and she has recently gotten into quilting herself. She is a fan of strip quilts and straight line quilting, so I thought I would make something different, outside her comfort zone, with lots of curves. I saw this quilt by Jenny and thought it the perfect pattern!


The nursery was to be done in greys and yellows, so I decided to combine these with some pink for the quilt. I pulled out my Quick Curve Ruler and cut up some of my precious Little Folks voile for the project, paired with Kona charcoal. This was my first time using the ruler and it was a breeze to use. Love it!

I cut and pieced, added a border, and used some Aurafil thread to do some pebble quilting on all the grey bits, new to me, and incidentally, very time and thread consuming! I ran out midway and had to wait 3 weeks for my new spools to arrive. I left the voile pieces unquilted to remain soft and silky to the touch. Then I did a few rows of hand stitching along the borders using Perle cotton thread to finish it off. I had a lovely time finishing the hand quilting and binding while at the lake.


But here's the thing. At some point along the way, I got it in my head that the blocks looked like...well, vaginas. And, being pink, fushia and yellow, they kinda looked like vaginas with various degrees of infection.

That's a hard thing to get out of your mind, once it's there.

So, when it was all said and done, I held it up to my husband skeptically, telling him my views ("yah, you are kinda right!"), and asked if this thing was even giftable. Well, that was when the unexpected happened. Last But Not Least spied the quilt, and declared with all the passion that a 5 year old can muster (which is quite a lot): Mom!! I love it! It is your best quilt ever!!

Huh?

I ignored her, thinking it would pass, but brought her along with me to be my quilt holder for some photographs. Between each and every one, she would give the quilt a mighty embrace:


And she pleaded, please Mom, can we keep it?? Pleeeeeeeeeeze?

In the end, who can resist that face? So, the quilt was granted as hers, and she took it outside to play with her lake friends, spending 3 full hours playing variations of Twister and leap frog with the quilt. No word of a lie! THREE HOURS. Worth its weight in gold. Who'd've thunk it?


And at dinner time that night, as we feasted on a gourmet meal of hot dogs and Kraft mac and cheese, LBNL declared that while dinner was superb, it was the second greatest thing Mama made that day, after the quilt ;)

So, it looks like I will be cursed with looking at that va-jay-jay quilt for years to come! And I have started a new (and anatomy free) replacement quilt for Baby Kiera!

Shared today for some giggles at Quilt Story and at Sew Modern Monday.