Pages

Monday, January 31, 2011

On the needles....

Had my first knitting lesson with Michele last week. I think this may be the beginning of a new addiction.....

Learning about all sorts of new things like gauge, skeins, and all sorts of crazy-ass abbreviations ;) It's a whole new world! Gets me giddy.

Starting with a simple hat pattern for The Middle Child, using a cheap acrylic yarn picked up at Zellers last year. I'll never get through that huge ball!
Also went to a local wool shop and drooled much/bought little. Settled on this gorgeous wool/acrylic blend for my youngest, who of course wants a hat, too!
Isn't it pretty? I love chunky yarns, and who wouldn't wanna hang out with "a riot of colors"??

Sunday, January 30, 2011

Thirty-seven

Wow! I must have given some really good clues, because 28 people guessed my age correctly! I am now a 37 year old :-) Can I not pass for a 20-something anymore?? Oh well!

So, I consulted Random.org and a winner was chosen (any tips on how to cut and paste it into your blog post??). Anyways the big winner was #25 of the smarties- Lee!

Congratulations! You are the winner of a $37 gift certificate from Fresh Squeezed Fabrics! I will be in touch to get your information to pass on to Randi so you can start shopping. Have fun! I know you will make some thing great with it....if you haven't already met Lee be sure to go check out her blog, Freshly Pieced.

Thanks everyone for playing and for the birthday wishes! And thanks again to Fresh Squeezed Fabrics for the prize!


Thursday, January 27, 2011

Thank you, Mother Nature

Woke up to a Winter Wonderland today.....


Sometimes you just have to abandon the "to-do" list and get out there and enjoy it.

It's not like the laundry was going anywhere, right?

Thanks for all the wonderful birthday wishes! Still time to enter the fabric giveaway with Fresh Squeezed Fabrics...click here.

Wednesday, January 26, 2011

happy birthday to me giveaway :-)

It's that time of year again! Don't worry, I don't shy away from birthdays....I am proud of each and every year I have accumulated ;) Plus, there is cake and presents- what's not to love??

This year I thought I would share the fun by GIVING a gift to one of my readers. I just rolled over the 300 follower mark- wow! Thanks, guys! Lots to celebrate. So, a little something for you.
Here's how to play- leave a comment and guess my age (be kind). That's it. One guess per person, though my lovely followers may have a second crack at it. If more than one of you gets it right, then I will call on Mr. Random to decide amongst the smarties.

If you poke around my blog, you will get a bit more info about me and see a few pictures to help you guess. I'll also give you a few hints:

1. I am older than 20, younger than 50.
2. I had an original Cabbage Patch Doll and liked to watch the Smurfs.
3. The first music I bought was on a record.
4. I learned to type on an actual typewriter.
5. I sported a perm and big bangs in high school.

What do you get if you win? Well, how about some fabric?

Randi at Fresh-Squeezed Fabrics is offering up a fabric gift certificate, the dollar amount matching my age! Don't you wish I was 100?? Not yet, my friends, but hopefully someday ;)


If you haven't yet been to Randi's shop your should really click on over and give it a look. Go ahead, I'll wait....I'm not getting any younger, though! Anyways, she carries basically anything your little heart desires. How about some Soul Blossoms?
Don't you love these Michael Miller bikes? They make me think of spring {sigh}.

Parisville, anyone?

Randi also has an awesome blog called i have to say. Pop by and say hello!

Now, it's time to eat cake! We'll meet back here Sunday after noon Central time to pick a winner! Good luck!

Monday, January 24, 2011

"Love" prevails- finished Sherbet Pips quilt

In the matter of love vs. hate....love. Definitely, love.
I have coveted the Sherbet Pips line since I first laid eyes on it- all my favorite colors, and such cute, lovable characters! I was so happy when I got my hands on a couple layer cakes! But then came the debate of how to put it all together.
I loved some of the snowball designs advertised by Moda for this line, but I decided to mix it up and make it my own by alternating it with 9 patches. By keeping the corners of the snowballs and 9 patch squares all the same color, I really like the pattern it creates! I used Kona Medium Grey as my solid, and needed just one layer cake to make the 42 blocks you see here- perfect lap quilt finishing up at 55" by 65".

The back- my goal was to keep it simple! I normally spend a lot of time doing a pieced back (like here, here and here), but decided that I needed a break after the hockey quilt :-) Also, there is no coordinating yardage of Pips yet available to tempt me. The answer was clear- minky! My friend Kathy has made a couple quilts with minky that I adore, so I wanted to give it a try. I admit I was almost scared off after reading this post, but I am so glad I went with it. It is SO soft and cuddly- perfect for this winter-themed quilt! It came in 59" wide so I didn't even have to piece it, just spray basted it and away I went. No trouble at all in quilting...the only issue came in trying to do some UN-sewing. Impossible to seam rip this stuff! I wasn't happy with the quilting design I had started, and wanted to take it out...anyways, after a bunch of frustration, I decided it wasn't worth the drama to stitch rip out and I just continued with it. Not perfect, but good enough!
Another thing I discovered with minky- hand quilting patterns are lost on this stuff, as it just swallows the stitches. My hand stitching was looking terrible on the back as some stitches would be hidden in the "hairs", making it look uneven. My solution? I ended up removing what I had started, then continued hand stitching the quilt top and batting layers only! Problem solved, and ample machine quilting elsewhere to hold the thing together, so why not?? My quilt, my rules ;) I used 5 different coordinating shades of Perle 8 cotton thread to frame each of the snowballs.
I think my favorite detail is the faux piped binding. I LOVE how this turned out, it really made the quilt for me. I used some Amy Butler lotus dots, then added the red solid piping for extra punch. I used this awesome tutorial. The binding/piping is machine applied as opposed to hand stitched, so this was another new experience. Will definitely use this technique again.
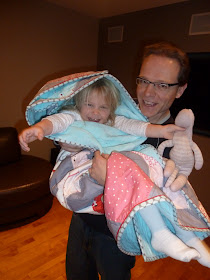
Finished it up this weekend, and already have spent lots of time enjoying it... a great cuddle companion for a movie, it was a tablecloth for a princess tea party, the aqua minky side was a pool where we played dolphins, we used it to make human burritos like this one....
This little lovely is a birthday present for me, from me. Yes, it is true- I am aging on Wednesday. I know, I know, hard to believe, I am looking so youthful! Extravagant gifts encouraged ;)

I'll have a gift for you as well- check back for a giveaway with Fresh Squeezed Fabrics!

Saturday, January 22, 2011

Monogrammed drawstring bags-a tutorial

Well, here I was sitting on a bunch of yards of U-G-L-Y hockey themed fabric, rejected from the hockey quilt, and a hockey-themed birthday party on the horizon. What to do? Hockey loot bags, of course!
I think these would make wonderful general gift/stuff bags as well (especially in cuter fabric), so I thought I would share the process with you.

Finished bags measure up about 14" long by 12.5" wide. For each bag you will need:
-1 piece of fabric for the body, measuring 30 inches long by about 13 inches wide (i.e. you can get 3 across on a 30" WOF piece)
-Two scraps of coordinating colors for the monogram and its base
-A bit of Heat n Bond Lite to applique the initial
- About 30" of narrow twill tape, ribbon or string of some kind for the drawsting
-Thread, and iron etc- all the usual suspects

Here's what you do:
1. Pick a font on your computer for the initial. I used Franklin Gothic Heavy in size 300 here.
2. Print in mirror image.
3. Cut out. 4. Grab your Heat n Bond Lite and iron the glue side to the wrong side of your initial-making fabric.5. Trace the reversed initial you made on the computer onto the paper side of the heat and bond. Cut out. If you are lazy like me, you can just hold the paper initial on it with your thumb while you cut around it. Flip it over and look at the fabric side...should look right!

6. Ta da! You have your initial ready. Now peel off the paper and iron onto your backing fabric. I cut my backing in a 4" circle, but feel free to do a square, heart or whatever floats your boat. Make sure it is larger than the initial, of course.
7. Topstitch on the initial to reinforce in a matching thread. If you are lucky enough to have letters made of straight lines, like the L here, just use your regular foot and pivot at the corners. For more curvy letters, like S or G, I used my free motion foot. I am thankful for coordinating thread...still working on this precision skill ;)8. Take you big piece of fabric for the body of the bag, and fold it in half. Position the monogram where you would like it and pin. Stitch in place. I used a blanket stitch here, but a straight stitch or zig zag would also be nice. Make sure you only stitch through ONE layer of the bag!
9. Refold the body of the bag with right sides facing. Do a straight stitch, with a 1/2 inch seam allowance, along the right side of the bag.

On the left side, stop stitching with 1.5" of bag top left. I went back again and did a zig zag adjacent to my straight stitches to reinforce.
(you may want to take a moment here to pay attention to anyone who may be seeking it.....)
10. That 1.5" part you left out? Fold the edges of it inward as shown, and do a straight stitch to make a V. This will be where the drawstring comes out.


11. With the bag still inside out, take the raw edge at the top of the bag and fold it over 1/4 inch to the wrong side of the fabric. Press.
Flip again, this time 3/4 inch (or wider if you have a wide sting for the drawstring).

12. Stitch along edge of fold to allow channel for drawstring.
13. Do a tiny stitch at the top of the bag where the string will come out to anchor it as shown.
14. Use a safety pin to thread the drawstring through the channel, and push the ends to the outside. Knot free ends together. A big bow instead of a knot would look cute if you were using some ribbon.
15. Turn right side out and admire!


Now go fill 'em up with stuff the recipients will love!!
Happy sewing! If you make some bags from this tutorial, I would love to see them- check out my Flickr pool!