
 I think these would make wonderful general gift/stuff bags as well (especially in cuter fabric), so I thought I would share the process with you.
Finished bags measure up about 14" long by 12.5" wide. For each bag you will need:
-1 piece of fabric for the body, measuring 30 inches long by about 13 inches wide (i.e. you can get 3 across on a 30" WOF piece)
-Two scraps of coordinating colors for the monogram and its base
-A bit of Heat n Bond Lite to applique the initial
- About 30" of narrow twill tape, ribbon or string of some kind for the drawsting
-Thread, and iron etc- all the usual suspects
Here's what you do:
1. Pick a font on your computer for the initial. I used Franklin Gothic Heavy in size 300 here.
2. Print in mirror image.
3. Cut out.
 4. Grab your Heat n Bond Lite and iron the glue side to the wrong side of your initial-making fabric.
 5. Trace the reversed initial you made on the computer onto the paper side of the heat and bond. Cut out. If you are lazy like me, you can just hold the paper initial on it with your thumb while you cut around it. Flip it over and look at the fabric side...should look right!
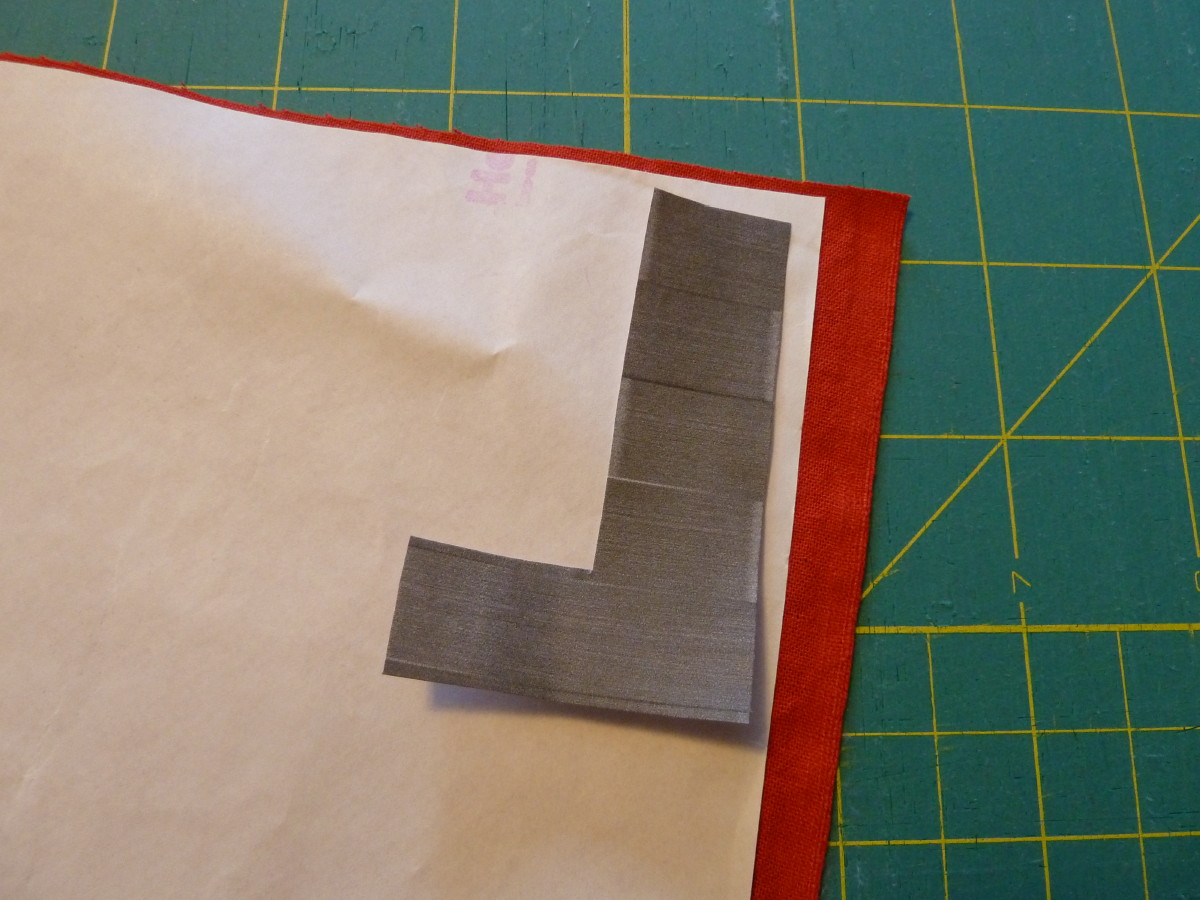
 6. Ta da! You have your initial ready. Now peel off the paper and iron onto your backing fabric. I cut my backing in a 4" circle, but feel free to do a square, heart or whatever floats your boat. Make sure it is larger than the initial, of course.
 7. Topstitch on the initial to reinforce in a matching thread. If you are lucky enough to have letters made of straight lines, like the L here, just use your regular foot and pivot at the corners. For more curvy letters, like S or G, I used my free motion foot. I am thankful for coordinating thread...still working on this precision skill ;)
 8. Take you big piece of fabric for the body of the bag, and fold it in half. Position the monogram where you would like it and pin.
  Stitch in place. I used a blanket stitch here, but a straight stitch or zig zag would also be nice. Make sure you only stitch through ONE layer of the bag!
 9. Refold the body of the bag with right sides facing. Do a straight stitch, with a 1/2 inch seam allowance, along the right side of the bag.
On the left side, stop stitching with 1.5" of bag top left. I went back again and did a zig zag adjacent to my straight stitches to reinforce.
 (you may want to take a moment here to pay attention to anyone who may be seeking it.....)
 10. That 1.5" part you left out? Fold the edges of it inward as shown, and do a straight stitch to make a V. This will be where the drawstring comes out.

 11. With the bag still inside out, take the raw edge at the top of the bag and fold it over 1/4 inch to the wrong side of the fabric. Press.
 Flip again, this time 3/4 inch (or wider if you have a wide sting for the drawstring).
12. Stitch along edge of fold to allow channel for drawstring.
 13. Do a tiny stitch at the top of the bag where the string will come out to anchor it as shown.
 14. Use a safety pin to thread the drawstring through the channel, and push the ends to the outside. Knot free ends together. A big bow instead of a knot would look cute if you were using some ribbon.
 15. Turn right side out and admire!
 Now go fill 'em up with stuff the recipients will love!! Happy sewing! If you make some bags from this tutorial, I would love to see them- check out my Flickr pool!
5 comments:
Perfect use for that fabric! Everyone will ooh and aah and you can just bask in the knowledge that most of that ugly novelty fabric is going to live at someone else's house.
What a great idea and sticking with the theme of the party.
Ok, how about 49 then?
I featured this today! Hooray! Swing by! :)
Amanda
www.todaystoptwenty.blogspot.com
I love this idea for favors! Thanks so much, I'll be linking.
Post a Comment