Friday, July 30, 2010

Pot holders

Made me some of those quilted pot holders I have been seeing everywhere, out of a bunch of my wee scraps and some natural cotton:
Nothing fancy, but I am a sucker for the simple look of a strip of patchwork against linen or cotton, aren't you?
I was thinking that pot holders are the perfect "tutorial" for quilt making- it involves a bit of design, piecing, quilting, binding. I think this would be a quick and cool way to introduce non-quilters to the craft, with a quick outcome. Maybe I should see who else of my friends I can get addicted......

Wednesday, July 28, 2010

Quick fix- patching up my man's jeans

So, we get to the cottage and my hubby presents me with a big bag FULL of jeans that look like this: Don't ask me what he does to get them like this!! Anyways, he asks if I can do something to fix them. For my kids, I would put some funky fabrics over the holes, but he is looking for something a little less flashy. But my options are few, as I have not been forewarned and don't have much at my disposal. I think of sacrificing one of the many pairs to patch the rest, but they are all different shades and colors so I don't think it will work. So then I come up with the idea of taking jean material from inside the back pockets.

So, I cut it out and then sewed around the pocket to close it off. Sometimes I used contrasting thread to give it a little interest.


The color is slightly darker here than the rest of the jean, but it even looks good flipped backwards:
However, the amount of material is limited. But in the end, the hubby was happy with the results. His comment: "These even look kind of stylish!" I don't know if I would go that far, but they are good enough for slumming it around the cottage :-)

Monday, July 26, 2010

Don't drink and sew

I have been chilling at the cottage, and enjoying my fair share of this:


Late one such night, I had the brilliant idea to piece together one of the twin quilt tops, the interrupted strip quilt (design here). All large pieces, should come together quickly and easily, right? So off I went. And sure enough, it was a quick job. I went to square up the ends and noticed one side was higher by a good inch of more- no troubles, just went to it with my rotary blade and was already toasting my Awesomeness as I lay it on the ground to admire. Well, even in my current state I could see the problem- one side of the strips was way off compared to the other...thus explaining the excess. But I had already sheared it off- sh@*! Anyways, it had finished up large so I trimmed the entire periphery back and inch, but still have this:

I am sure I will come up with a solution with the binding! Overall, it looks nice.


I also pieced together the corresponding quilt top (revised design here)- this time, completely unimpaired, thank you very much!

And here are the set of them:


Not bad, but I am not as sure of the one on the right...... What do you think? It may be a bit too busy in relation to the first, and as they are meant to be hung on the wall side by side, I may want to change it up a bit. Maybe I will make a third and then decide the best 2 together?

Friday, July 23, 2010

Urges

Look what arrived....
I feel a baby boy strip quilt coming on!

Wednesday, July 21, 2010

Cottage curtains from vintage tablecloth

When we had our family vacation in Brainerd last month, we hung out at a resort and did almost no shopping. Unusual for me- I am not a big shopper, but am known for doing some damage at Target when I get to the US! When we crossed the border and said our total shopping totalled under $100, the border guard looked at me funny.....What did I buy? Well, there was the life sized Edward that you met modelling my scarf here (" A what???" he asked), a book of Paul Bunyan tales from 1938, and a vintage tablecloth. I had my eye out for one for awhile, after being inspired by this picture in a thrifty decorating magazine:(I am pleased to report my tablecloth only cost $18, not $24 as quoted in the article. Score!)

So, I took my scissors to it, and transformed it into kitchen curtains for the cottage as follows:

A little bit of color and vintage feel to liven up my tiny kitchen, and I love it. Simple, but lovely, I think!

Sunday, July 18, 2010

Summer reading

I will be on vacation mode for the next little while- off to the beach! I will check in from time to time, but in the meantime, I will be doing some serious relaxation. Here is the stack I have accumulated, to read while my toes are in the sand......


A bit ambitious, for sure, especially considering the 3 little monkeys who will require the lion's share of my attention, but I can't wait to take a crack at 'em. There is a varied lot of styles- vampire/werewolf reads, a World War 2 love story, the latest by Miriam Toews (a fellow Manitoban), the Stieg Larsson books I have heard much about. What do you think? Have you read any of these? Where do you suggest I start?

Friday, July 16, 2010

Applique t-shirt for my birthday girl

Five years old! I know it sounds cliche, but it seems like only yesterday....

The Middle Child always begins planning her birthday party in January, when Big G celebrates his birthday. This year, the undisputed theme was- FROG. We catch buckets of them at the lake, and she adores them, along with all creatures big and small- a really nurturer, my girl. So, I thought I would make her a froggie t-shirt for the big party.So cute yet so easy. I found this guy as a clip art online, then printed him onto some transfer paper from Dharma Trading. I ironed him on to a scrap of white solid, folded and pressed the edges, then blanket stitched it onto the pink floral fabric (her favorite from my stash). Again- fold, press, sew, on to a t-shirt I got at Old Navy for $5.
On the back, I added a little "surprise."
I think she liked it!
Party time, better "hop" to it! Happy birthday, Sweetheart!

Thursday, July 15, 2010

Summer's here! Mesh beach bag tutorial

This tutorial is inspired by this really cool mesh material I recently found at a little quilt store called Keeper's Quilts in the tiny beach town of Winnipeg Beach. It is unlike anything I had seen before (though I don't get out much...it may be everywhere). It is a soft plastic texture and came in a variety of bright colors. It was labelled "pet screen" but the owner, Shelly, had made a small purse from it, and immediately I thought that if I enlarged it, it would become the perfect beach tote. So I don't take credit for the design! While this fabric is awesome, I think this bag would look equally cute substituting a canvas material, so whatever you have on hand, give it a try! Or, give Shelly a call and she will mail you out some:-)Let's go!

You will need:

-a piece of mesh or canvas measuring 20" wide by 27" long (you can vary this for the size of bag you need)
-a fat quarter of cotton quilting weight fabric for the trim

-a small amount of coordinating fabric for the handles (28" by 6 "), plus some narrow stips of quilt batting (I used my scraps) or interfacing (26" by 2")- or use an alternative handle material!

-coordinating thread
(Look at me, cutting in to my Nicey Jane. Sweet!)

Cutting

- from your fat quarter, cut a piece 20" by 9", and 2 pieces 20" by 4.5"
- for the handles, cut 2 pieces 28" by 3" from the fabric, and 2 pieces 26" by 1" of batting
Instructions:

Take all fabric pieces and press ends over 1/4" along long sides only.

Take large piece and gently press in half, wrong sides facing, to mark center. Similarily, press the 2 handle pieces in half. Take other 2 trim pieces and press 1" over with wrong sides facing (see below).

Fold mesh in half. Center large piece of fabric over fold with wrong side to mesh, so that it extends equally on either side.


Pin, tucking under the 1/4 seam you just pressed.

Sew along length, close to edge.
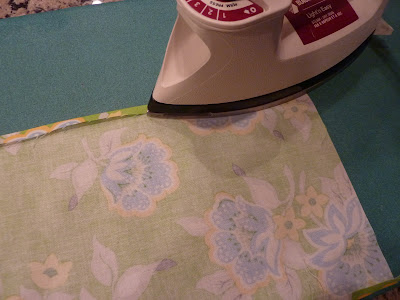
Take trim piece and line up fold on one top edge of mesh, wrong side on mesh. Pin short side to mesh on back side (i.e. side that does not have fabric sewn to it yet), pulling remainder out of the way, and sew it to the mesh. Once done, fold over other (longer) half, pin and sew. Repeat with other trim piece on remaining raw edge of mesh.
Take handle fabric and insert batting, tucking under folded seam.

Line up edges, and sew closed. Sew along opposite (fold) side for esthetics.

To attach handle, measure 6" in from side edge of mesh , then fold raw end of handle on itself.

Sew in place using a cross box as shown. (Note- originally I did this on the wrong side of the bag to hide it, but liked how it looked so much I attached them on the outside of my next bag.) Repeat to attach other 3 handle ends.
Flip bag so right sides are facing. Ensure that trim and bottom fabric seams line up (trust me, it is not fun to stitch rip this stuff!), trim excess fabric from sides to make straight, and sew from top to bottom along each side.


Reinforce with a zig zag stitch.


To finish, finger press this seam to one side, and sew down with a straight stitch (sorry, not shown!). This step is awkward, but you don't need to go entirely to the bottom of the bag, just enough to flatten the seam as the material is stiff. Turn the bag right side out, and you are done!
Fill 'er up with towels, a good book and a cold drink. Enjoy your new mesh beach bag, and most importantly, enjoy the beach!

As with all my tutorials, they are intended for personal use only and not for production for sale.
Feel free to blog about your creations, and a link or credit back to this tutorial would be appreciated. I would love to see your bag, so do send me a link or email with a picture, or add one to my Flickr group! Happy sewing!


Wednesday, July 14, 2010

Back on the road, after a roadblock

Ready to roll on my Twin Wheels quilts for Suzy's babes! I had posted my plans here, then went to cut up quilt #1 and realized that it wasn't going to fly. I had calculated the fussy cut center squares to measure 3X3, but the cars on the fabric were mostly too large for that. Since the two quilts are going to be hung on the wall, side by side, I need them to finish up the same size, so I haven't much wiggle room (and had already cut quilt #2)..... Anyways, I tried to make the original design work a couple ways, but still felt unsatisfied, when my husband reminded me, "this is an opportunity to get creative." So, back to the drawing board I went, and came up with a couple new designs to show Suzy. Here is what we decided on:
This is an "original design," so we will see how it works out! I decided to do a brick pattern running vertically, but will vary the widths of the bricks to give it an asymmetrical and modern feel. I am also going to repeat fabrics in adjacent strips (can you tell from my scribbles?) to give it some "movement." I added a horizontal strip, which I think compliments Twin Quilt #2 design, which has a similar strip running vertically. I think these are going to be great. Now the fun begins as it all comes together!

Tuesday, July 13, 2010

A logo!

My crafty and fabulous friend Samantha has been at it again! She has offered to help me "pimp my blog" with a new design....or, any design at all, that is :-) I will be putting it up soon (I am a bit technically challenged, so bear with me). But in the meantime, today, on our girls' day out (she is in town visiting- yay!), she presented me with these beautiful things:
That's me, on the sewing machine. I think I look cute as a cartoon!


Don't you love the packaging?


And don't forget THESE:
Aren't they great? I love the square shape, and the backs are super cool. I feel like a rock star! Thanks, Sam!

Monday, July 12, 2010

Stash additions and ramblings of a fabric addict

I have been a bit of an online fabric shopaholic lately. But who can help themselves with all the gorgeous fabric lines out there, and the amazing quilts people have been turning out on their blogs of late to inspire us? Here are a few quilts and fabrics I have been obsessing over:
Red Pepper Quilts has to be one of my favorite blogs at the moment. I have a stash of Anna Maria Horner Little Folks I love, and think I will have to cut it up to make and adult version of this quilt for myself. I also got some size 8 Perle cotton thread to try my hand at hand quilting like shown on it. I also ordered up some flannel Little Folks this week, you know, just in case I "need" it. RPQ is also responsible for the pile of Far Far Away 2 Fabric I just ordered from an awesome online fabric store up here in Canada called Pink Panda Fabrics. The prices are slightly higher than in the US but still very competitive, especially with the "quantity discount" (cringe) that I earned! With no border duty and free shipping (!!!), it gets me every time. Plus it arrived in 3 DAYS...unlike the weeks of anticipation waiting for a cross-border buy. I will make a couple girly quilts with the FFA2 for sure, but can also see it paired with linens in some cute fall dresses or tops for my girls, or some bibs......Then, another couple beautiful quilts in Joel Dewberry Modern Meadow. A baby boy one by Bijoux Lovely blogged here, and another by Cluck Cluck Sew. I love the masculine feel to many of these prints, and I am a sucker for blues..... That addition to my stash is in the mail and should be arriving shortly.
I have also added some of this and that. Some pretty things on clearance from My Needle and Thread,

then some charm packs of these adorable Japanese fairy tale prints, some more Hunky Dory....

And finally, there is the Heather Bailey Nicey Jane. I love it! I have tagged some of this stash to make a quilt for me, mixed in with some solids in grey and seafoam, and the rest for a couple other projects. Then, this week I had the happy accident of finding a sweet little quilt shop on the strip at Winnipeg Beach, a beach town just north of home. It is called Keeper Quilts, and I picked up some beautiful natural cotton, some thermal batting (for pot holders) and a bunch of lime green plastic mesh fabric, which I plan to use to make a beach bag tutorial! Stay tuned!

Now I just need to find more hours in a day, right?

And please- nobody forward this blog post to my husband! What he doesn't know won't hurt him, right? I'll start my "12 steps" next week....or after the fall collections come out....